Pepper pride top
- crochetyblog
- Jun 22, 2025
- 5 min read
Happy Pride y'all! Time to celebrate with a free pattern.
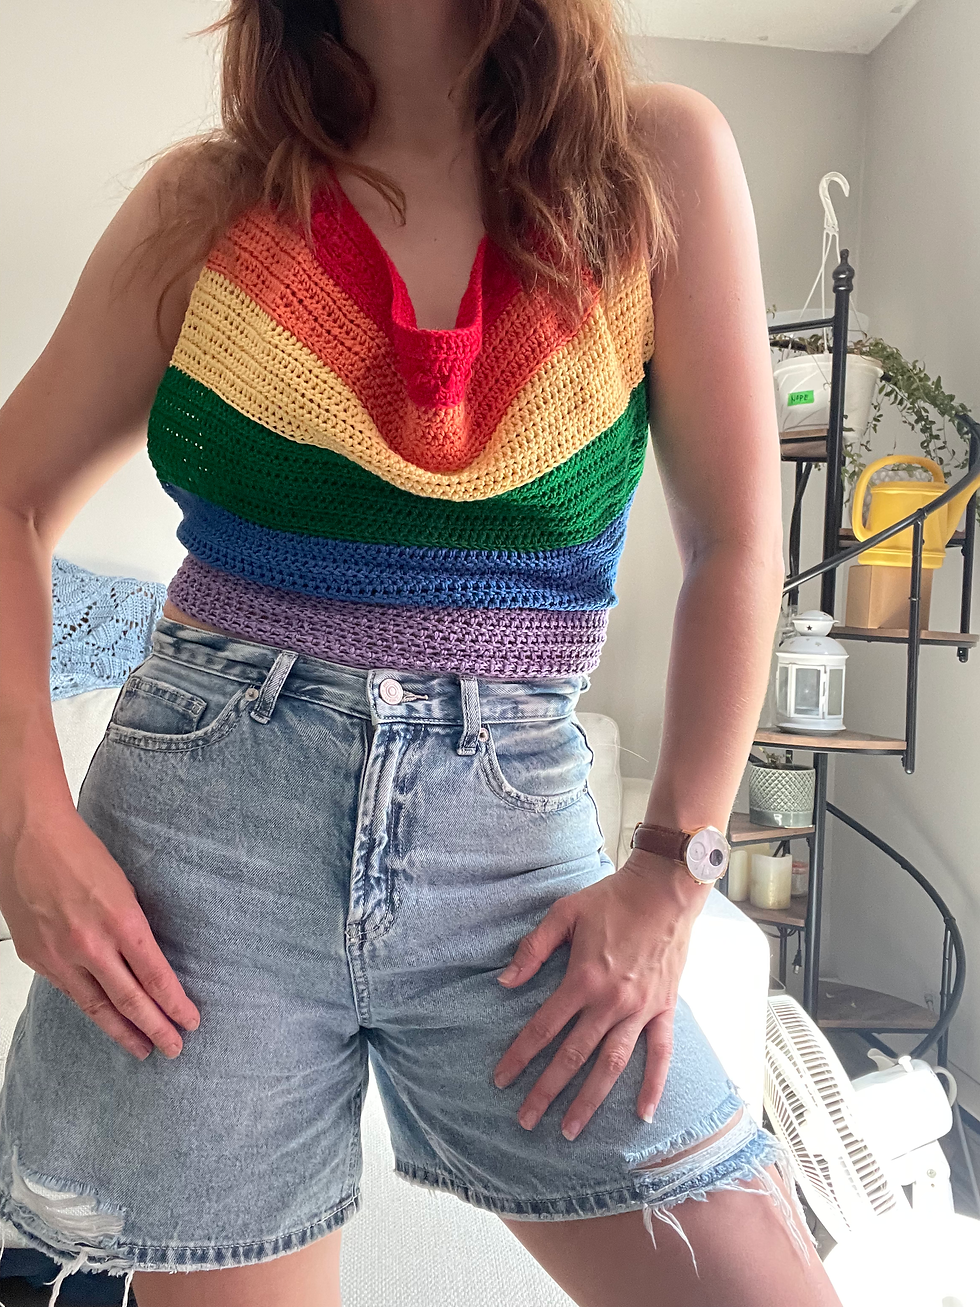
Most beginner patterns ask you to make two rectangles, but why make two when you can just make one?
It’s pride month - let's go bare back

Before you begin:
This top is made to measure and is worked from the top down using US terminology. This is a great pattern for advanced beginners.
Note that each stripe is a little bit longer than the previous one (orange is longer than red, yellow longer than orange, etc).
Stitches used:
Abbreviation | Stitch |
Ch | Chain |
DC | Double crochet |
HDC | Half double crochet |
HDC BLO | Half double crochet back loop only |
PS |
Materials:
Yarn - six colours to make a rainbow or dealers choice
I recommend a DK or sport weight in a fibre that drapes well
Remember: crochet gets HOT in the summer
Crochet hook to work with your chosen yarn or slightly larger to make it more drapey
Tapestry needle to weave in ends
I used the following yarn in DK weight with a size 4.5 crochet hook:
Yarn A: Red (leftover yarn, not sure of the brand)
Yarn B: Orange (Sirdar Snuggly Baby Bamboo DK, Titchy Tiger)
Yarn C: Yellow (Loops and Threads Silky Soft, Banana)
Yarn D: Green (Yonkey Monkey, Green)
Yarn E: Blue (Loops and Threads Silky Soft, Cobalt)
Yarn F: Purple (Loops and Threads Silky Soft, Violet)
Pepper Pride Top: Pattern
Body:
Starting with Colour A, chain a multiple of three plus one for the neckline. The chain should be wide enough to cover your chest and hang down in a cowl neck.

The neck ties will be attached at the end and will let you adjust the coverage of the neckline.
I chained 82 in a DK weight yarn to begin, and I typically wear a size medium.
Row one: Ch two, then DC in the third chain from hook. Continue to work a DC in each stitch to the end of the row. Ch two, turn.
Row two: HDC across row. Ch two, turn.
Row three: DC across row. Ch one, turn.
Row four: SC, PS, skip one stitch, SC in next stitch. Continue from to the end of the row, ending with a SC. Ch one and turn.
Row five: SC in first stitch (last SC from previous row), Ch 3 and SC in next SC from previous row, skipping over the puff stitch. Continue from to the end of the row, ending with a SC. Ch 2, turn.
Row six: HDC in last SC from previous row. Work two HDCs in Ch space from previous row, work one HDC in SC. Continue from to the end of the row, ending with one HDC in the last SC from the previous row.
Colour change
Leave a long tail to weave in the ends for Colour A and pick up Colour B. Ch two to begin the next row using Colour B.
Row seven: HDC BLO to the end of the row. Ch two, turn.
Note: using the back loop only gives you a clean edge for the colour change
Row 8-11: HDC across row. Ch two, turn.
Row 12: HDC across row.
Colour change
Leave a long tail to weave in the ends for Colour B and pick up Colour C. Ch two to begin the next row using Colour C.
Row 13: Repeat row seven with Colour C.
Row 14- 19: HDC across row. Ch two, turn.
Row 20: HDC across row.
Colour change
Leave a long tail to weave in the ends for Colour C and pick up Colour D. Ch two to begin the next row using Colour D.
Row 21: Repeat row seven with Colour D.
Row 22- 29: HDC across row. Ch two, turn.
Row 30: HDC across row.
Colour change
Leave a long tail to weave in the ends for Colour D and pick up Colour E. Ch two to begin the next row using Colour E.
Row 31: Repeat row seven with Colour E.
Row 32: DC across row. Ch two, turn.
Row 33: HDC across row. Ch 2, turn.
Row 34- 39: Repeat rows 32 and 33.
Row 40: DC across row.
Colour change
Leave a long tail to weave in the ends for Colour E and pick up Colour F. Ch two to begin the next row using Colour F.
Row 41: Repeat row seven with Colour F.
Row 42: DC across row. Ch two, turn.
Row 43: HDC across row. Ch two, turn.
Row 44- 48: Repeat rows 42 and 43.
At the end of row 48, we’re making the tie for the bottom of the back of the top. Don't tie off your ends here- we're continuing to work directly off of the body of the top to avoid creating more ends to tie in.
Bottom tie, side one:
Chain to create a tie long enough to tie at the back of your top. I chained 64 stitches.
Row one: Work a DC in every Ch stitch. Continue to DC across the main body of the top until you reach the other side.
Bottom tie, side two:
Chain the same number of stitches as your tie for side one. Work a DC in every Ch stitch. Continue to DC across the body. Place a slip stitch in the first stitch of the tie for side one to smooth the edges.
Top ties, side one:
Using Colour A, attach your yarn to the top right corner of your top from the wrong side.
Row one: HDC in the first three stitches by the corner, then SC, then slip stitch. Ch two and turn.
Row two: Skip the slip stitch, HDC in the next four stitches from previous row. Ch 2, turn.
Row three: HDC in first three stitches. Ch 2 and turn.
Row four: HDC across, Ch two and turn.
Repeat row four until the top tie is the length you need to tie it behind your neck. I recommend making it a little bit longer so you can adjust where the top sits.
Top ties, side two:
Using Colour A, attach your yarn to the top left corner of your top from the wrong side.
Row one: HDC in the first three stitches by the corner, then SC, then slip stitch. Ch two and turn.
Row two: Skip the slip stitch, HDC in the next four stitches from previous row. Ch 2, turn.
Row three: HDC in first three stitches. Ch 2 and turn.
Row four: HDC across, Ch two and turn.
Repeat row four until the top tie is the same length as side one.

Finishing your work
Weave in your ends (there will be a lot of them!) and then your top is good to go.
Happy pride!


Comments